Easy DIY charger plates that bring all the holiday whimsy to your table
A fun, festive and budget-friendly way to decorate for your next dinner party

One of my favourite things about this time of year is trying to warm up our home with fun and festive decor and accents to create a cheerful vibe — and setting a table is the perfect place to start. Enter the cutest charger plates the holiday season has even seen. Come along! I'll guide you through a few simple steps. After a quick trip to your local craft and dollar stores you'll be ready to DIY.
Note: When making your item selections pick a variety of textures. I also added faux candy elements to keep it fun and playful.
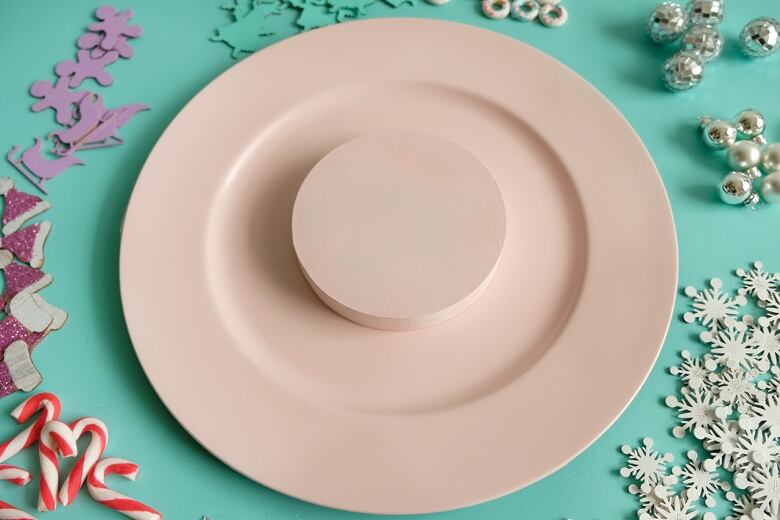
Here's what you'll need:
- 4-6 variations of wooden cut outs, with at least 4 of each type (I used Santas, snowflakes, sleighs, gingerbread men, stockings.)
- Acrylic craft paint (I used white, purple and turquoise.)
- 10 mini disco balls
- 2 packages of mirrored snowflakes
- 12 wooden rings for doughnuts
- Mixed colours of sparkles (I used pink, blue and silver.)
- 12 mini plastic candy canes
- 12 mini Christmas balls
- 1 metre of grosgrain ribbon in your colour palette
- White glue
- Parchment paper to cover your work surface
- 2 plain white charger plates
- 2 circular MDF boards used to raise your plate
- Pink spray paint
- Glue gun
- Glue sticks
*These materials will make two charger plates. Double item quantities to make two additional plates.

Here's how to do it:
1. Start by prepping the small decor items you will be gluing to your charger plate. The first thing I like to do is pick a colour palette. Since I wanted my table setting to be playful, I went with pink, turquoise, white, silver and purple with some red and white from the candy canes. You can find paints and small wooden cutouts at almost any craft or dollar store. Start by painting your snowflakes white. I used parchment paper as a surface to paint on and applied two coats of the white.


2. Next, it's time to paint your other wooden elements. I chose purple and turquoise. If you want to add some sparkle to your project, paint some pieces with white glue after they're painted, and dust on some sparkles. For the doughnuts, I painted a circle of white around the wooden rings to mimic icing and glued on some colourful glitter for the sprinkles. Cute right?


3. Time to spray paint the charger plates and the small round MDF discs. Be sure to do this outdoors or in a well-ventilated area. Apply thin layers until completely covered. If the MDF discs don't come sealed, adding a coat of white paint will prime it for the spray paint.

4. Once the paint is dry, use a hot glue gun to secure your discs onto the centre of the charger plates. This will elevate the dinner plates and give us space between the charger plate and the dinner plate for larger elements like mini disco balls.


5. Glue time! Secure all of your elements to the plate using the hot glue gun. I made some tiny bows out of ribbon to add to my plates as well. Have fun with your design; pieces can overlap and repeat. Think about your colour placement and try to keep a balance of colour and style as you work your way around the charger plate. Repeat this step, gluing the rest of the elements onto your additional plate(s).


6. Time to set the table! Your friends and fam will certainly be charmed with your playful crafting skills.


Don't forget to tag @cbclife in your creations. Happy crafting!
Lady Hayes is a designer, photographer and mama, known for her beautiful floral inspired projects and lifestyle. Her love of flowers shines through her couture crafted Flower Crowns and Petal Pop, her line of Floral Confetti with sun dried roses and gold confetti glitter. Stay connected! Visit Hayes over on her Instagram or visit her website to shop and say hi!